How to add Custom fields to your form
If you need more information from your customer then what is collected in the default intake form, this walk through is for you.
Learn how to add custom fields to your form and safely collect the information you need to provide your service or class.
Add Custom Fields:
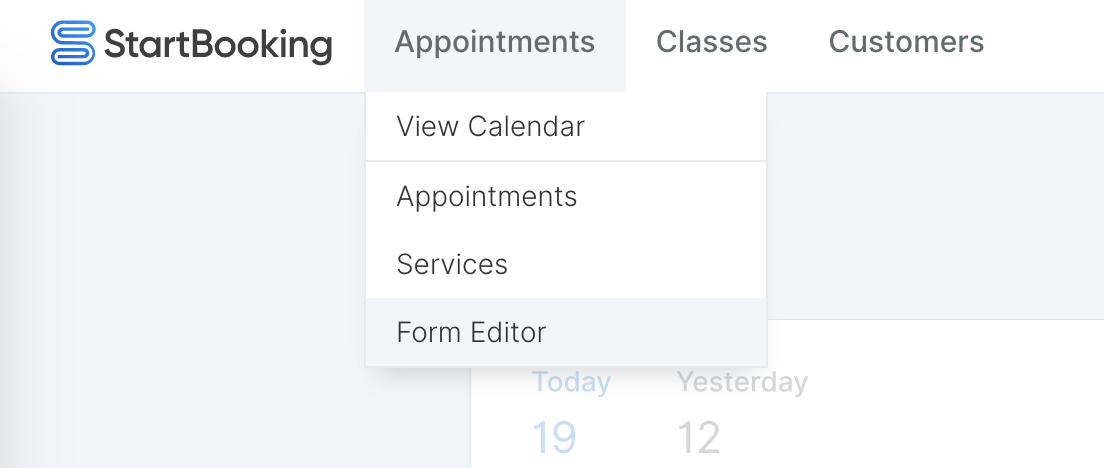
First we need to bring up the form editor. You can do this by hovering over the "Appointments" tab in the menu of your StartBooking dashboard. (This can also be done from within your WordPress Dashboard. Just click on Bookings from the left hand menu and then click on form editor.)
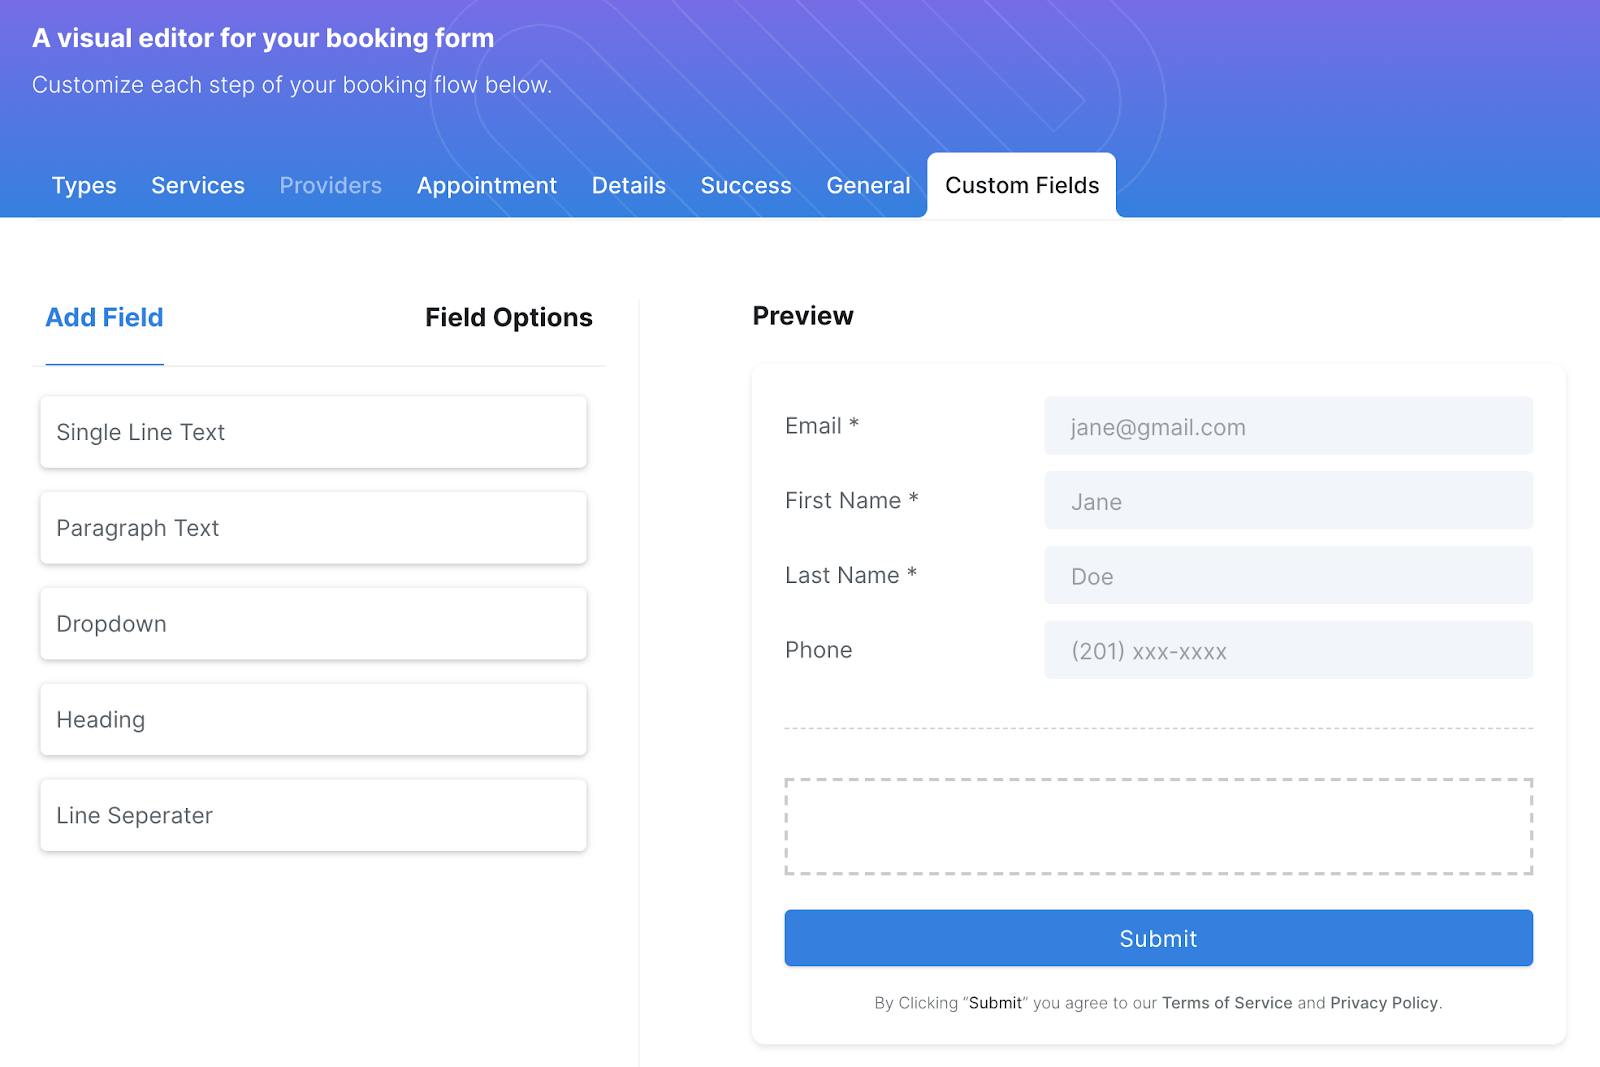
This will take you to the Form Editor. Here you can make changes to the way the form looks and feels (click here for a walk through of the Form Editor)
Click on the tab "Custom Fields"

You are now at the StartBooking form visual editor. Here you can add your custom fields with an easy to use form editor.
To add a new field, simply drag and drop the field type from the left side over to the right side and drop it in the hi-lighted box.
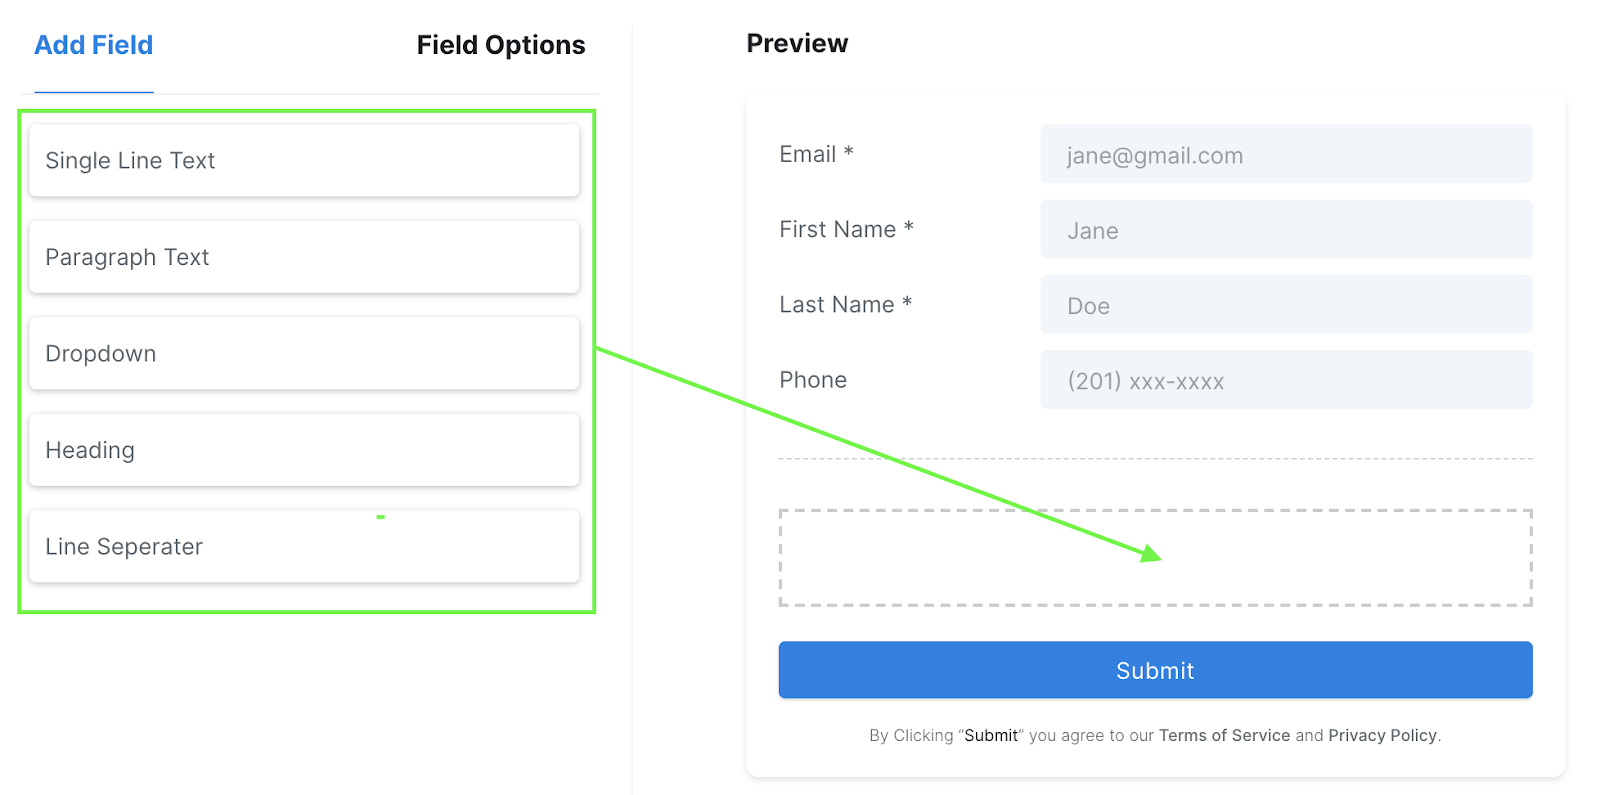
Now that you have a new field on your form it's time to set up the field to collect the information you want.
In the Preview section click on the new field.
This will automatically open the "Field Options" tab on the left side of the editor.
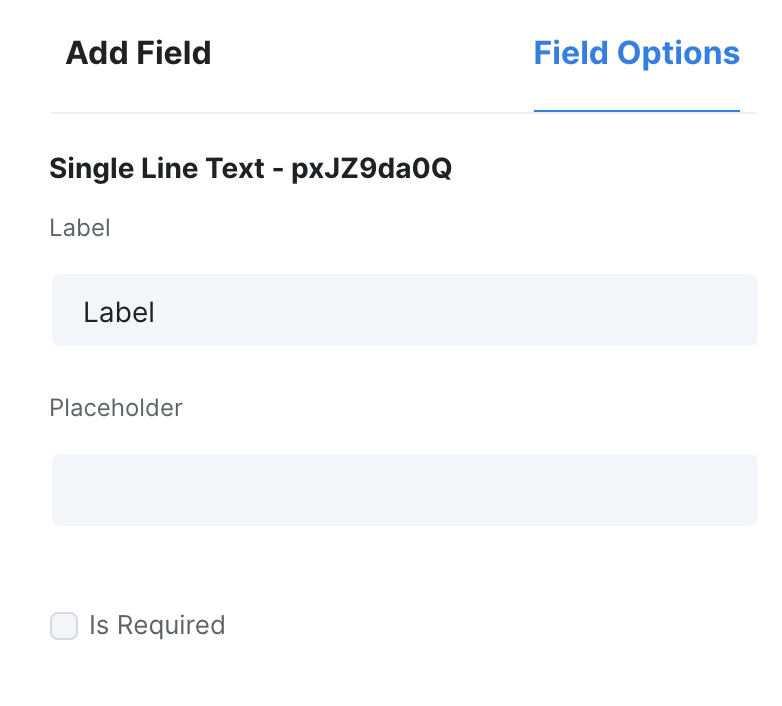
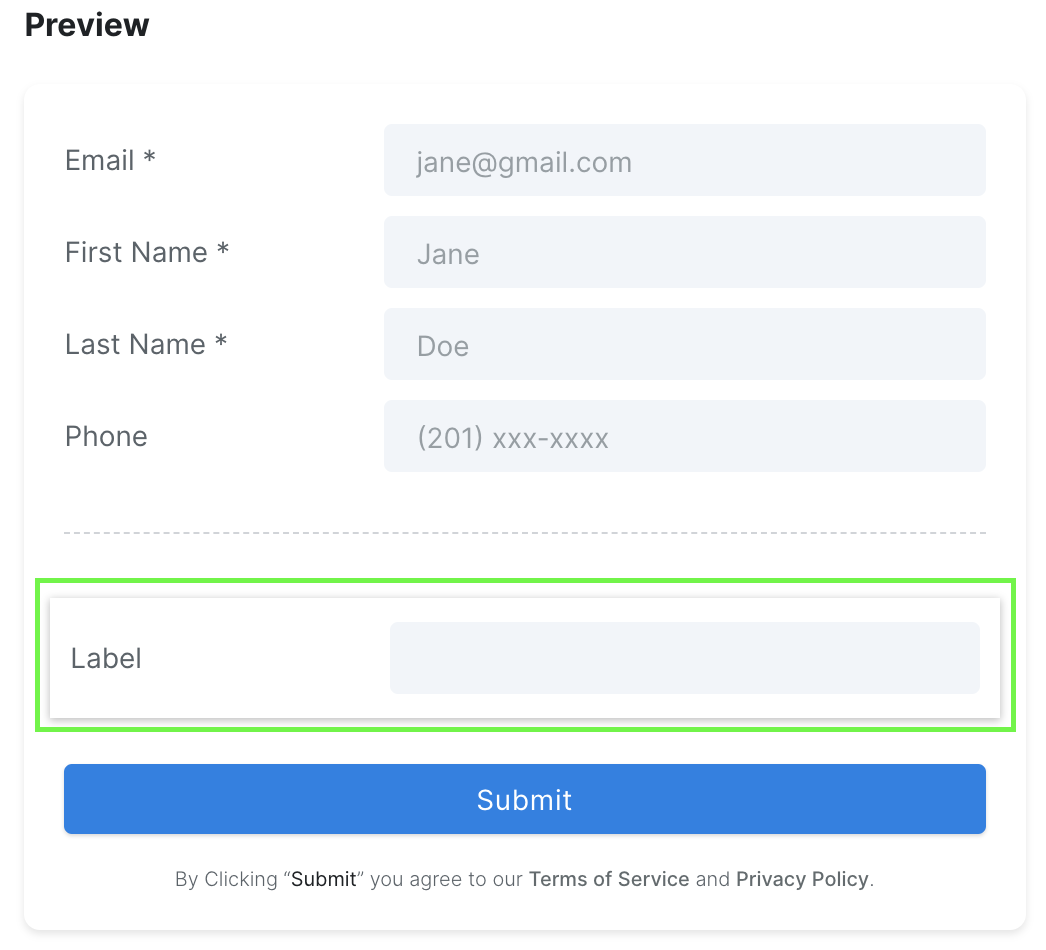
In this example I have added a "Single Line Text" field. Once I click on the new field it automatically opens the "Field Options" tab on the left side. Here we can edit Label and any placeholder as well as make it a required field.
(Each Field type will have different Options so just add the field and then click on it to see the options available.)
Once you have entered a label and decided on placeholder text (this is not a requirement. You can leave this blank) you are ready to go.