Zoom Integration Overview
The Zoom integration with Start Booking provides you with the ability to include Zoom links with your appointments and classes. This integration works with free and paid Zoom accounts and connects at the user level which means each user on the Start Booking account can have their own connection.
How to Connect Zoom with Start Booking

- Go to the integrations page of your account:https://app.startbooking.com/account/integrations.
- At the bottom of the page you will see the Zoom integration. Click the Connect button to start the connection process. If you aren't logged into Zoom you will need to log in and allow Start Booking access to your Zoom account.
- After approving the connection, you will be brought back to Start Booking.
Settings
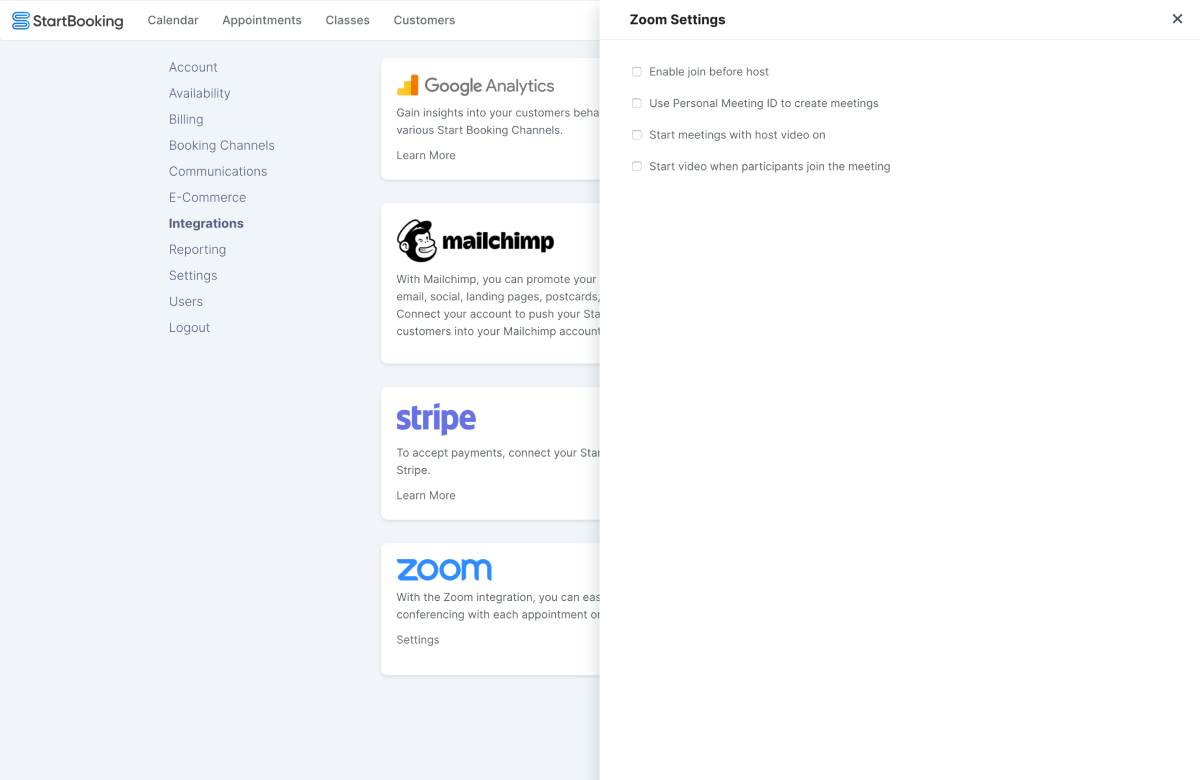
There are 4 settings for customizing your integration.
Enable join before host
This setting allows your Zoom participants to join the call before the host joins the call.
Use Personal Meeting ID to create meetings
If you want to use your personal meeting ID for your meetings, check this setting.Learn more about Zoom's personal meeting ID's.
Start meetings with host video on
By enabling this, all Zoom meetings will have the host video camera turned on by default.
Start video when participants join the meeting
Start meetings with the participants' video on.
How to add Zoom to appointments
If you want a Zoom link to be created with your appointments, follow the steps below.
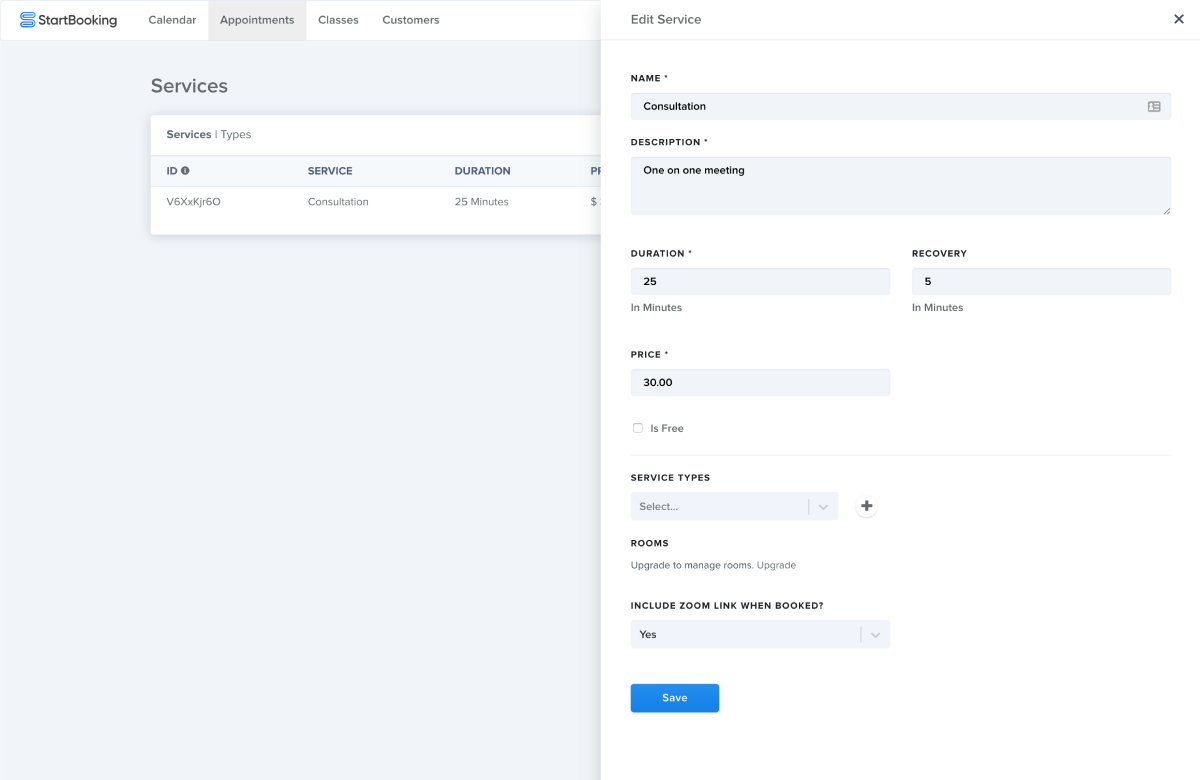
- Go to your services page:https://app.startbooking.com/services
- On the services page, either create or edit the services that you want Start Booking to create a Zoom link for. Within the service slide out, you will see a dropdown at the bottom of the form that gives you the option to include a Zoom link with the service.
- Whenever a customer books a service that has Zoom enabled, Start Booking will automatically create a Zoom link with the appointment.
How to add Zoom to classes
If you want to add a Zoom link with your classes or group events, follow the steps below.
- If you haven't already, create a class here:https://app.startbooking.com/classes. If you already have classes, go to step 2.
- Go to your schedules screen here:https://app.startbooking.com/classes/schedules
- On the schedules page, click to create a new schedule. Within the schedule slide out, you will see a dropdown at the bottom of the form that gives you the option to create a Zoom meeting for each occurrence of the class schedule.
Accessing your Zoom Meeting links
You can view your Zoom meetings directly from the Start Booking calendar. Click on the appointment you are looking to join and you will see a Zoom icon and link on the popup.

In addition to the calendar, Zoom meeting links will also be emailed to your customers within their confirmation emails.
Uninstallation
To uninstall the application, go into your Start Booking account to the integrations section and locate the Zoom integration.
Click the Disconnect button and we will disconnect Start Booking from your Zoom account.
Having additional issues?
If you are having issues with the integration and we don't address it in this article, we recommend you email [email protected] or start a chat from this article.