Form Editor Overview
The Start Booking form editor allows you to customize each step of your online booking flow. Whether you are using classes or services, the form editor can help you customize your form to your specific needs.
Customize Services
To customize your services, you can access the form editor from either the Start Booking app or the Start Booking plugin.
The form editor in the app can be found at:https://app.startbooking.com/#/editor/service/types
Below is a breakdown of the controls you have to customize each step of your booking flow.
Types (Optional Step)

Here you can edit how your service types are displayed, such as changing the Heading text or description. You can even hide the heading or description all together.
Note: If you don't have any types created, this step will be skipped by default.
Step
- Skip Step: Check if you want to skip the types step in the booking flow.
Heading
- Heading Text: Change the text of the heading on the types step.
- Heading Hide: Check if. you want to hide the heading in the types step.
Type Description
- Hide Description: Check if you want to hide the type description from displaying.
Services (Optional Step)
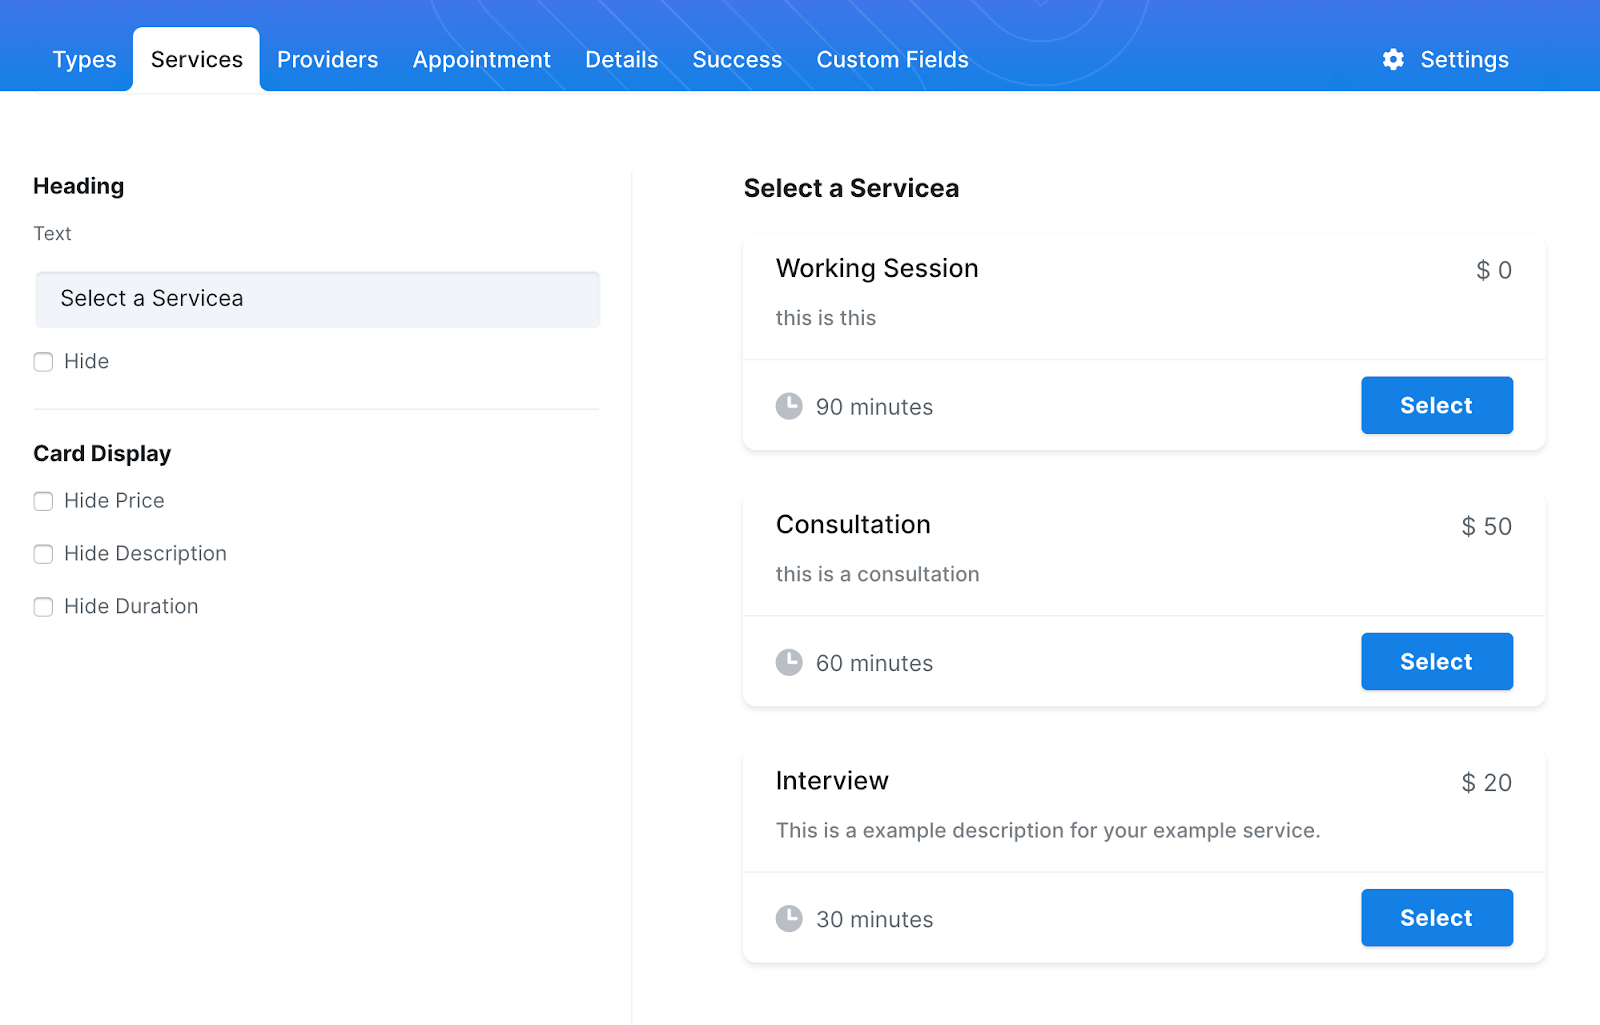
The services step allows you to customize how your services are displayed. You can change the heading text and toggle the elements that are displayed on each service card.
Heading
- Heading Text: Change the text of the heading on the services step.
- Heading Hide: Check if you want to hide the heading in the services step.
Card Display
- Hide Price: Removes the price from the service card.
- Hide Description: Removes the service description from the service card.
- Hide Duration: Removes the service duration from the service card.
Providers (Optional Step)
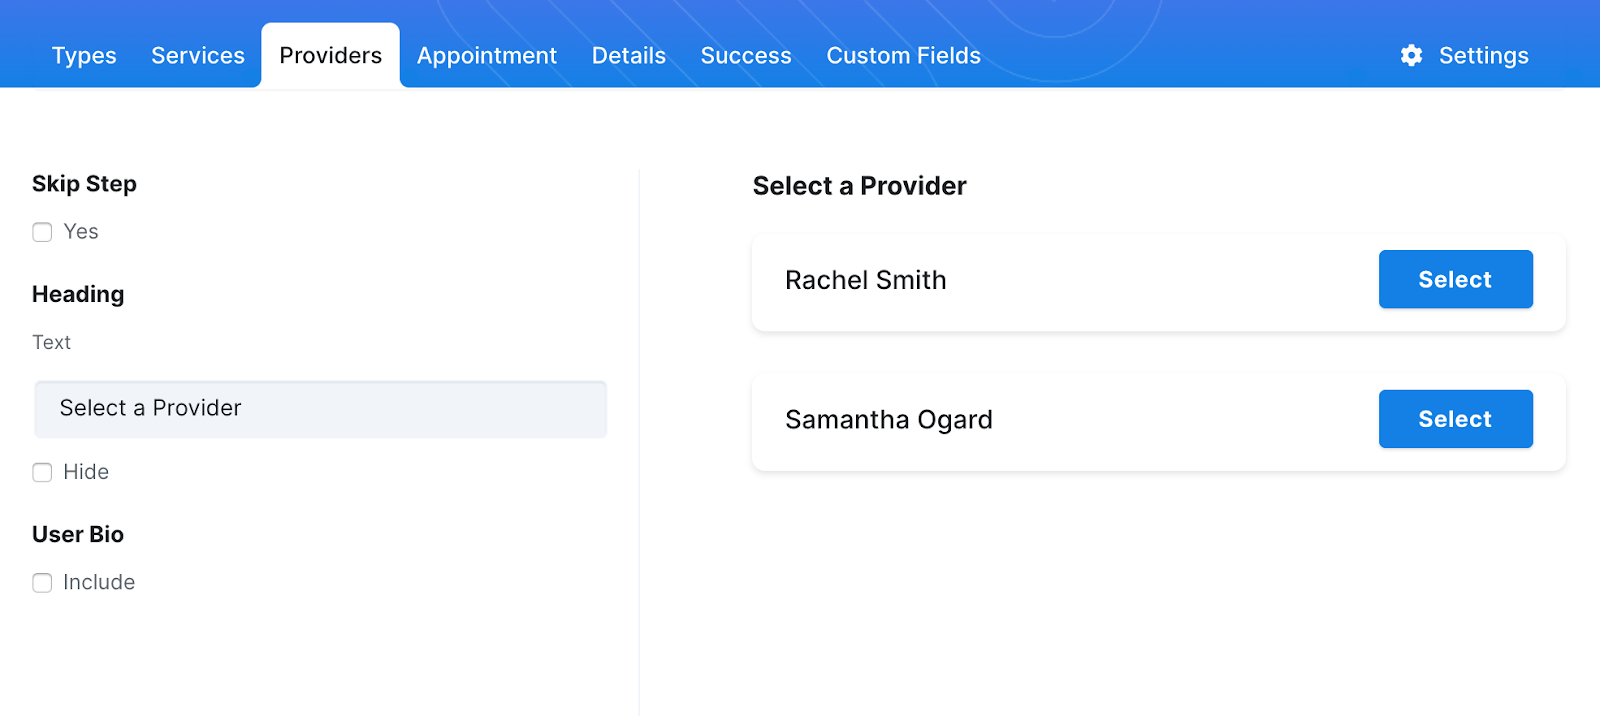
The providers steps offers you the ability to change the following settings.
Step
- Skip Step: Check if you want to skip the provider step in the booking flow.
Heading
- Heading Text: Change the text of the heading on the provider step.
- Heading Hide: Check if you want to hide the heading in the provider step.
User Bio
- User Bio: Check if you want to include your user's bio's with the user card.
Appointment (Required Step)
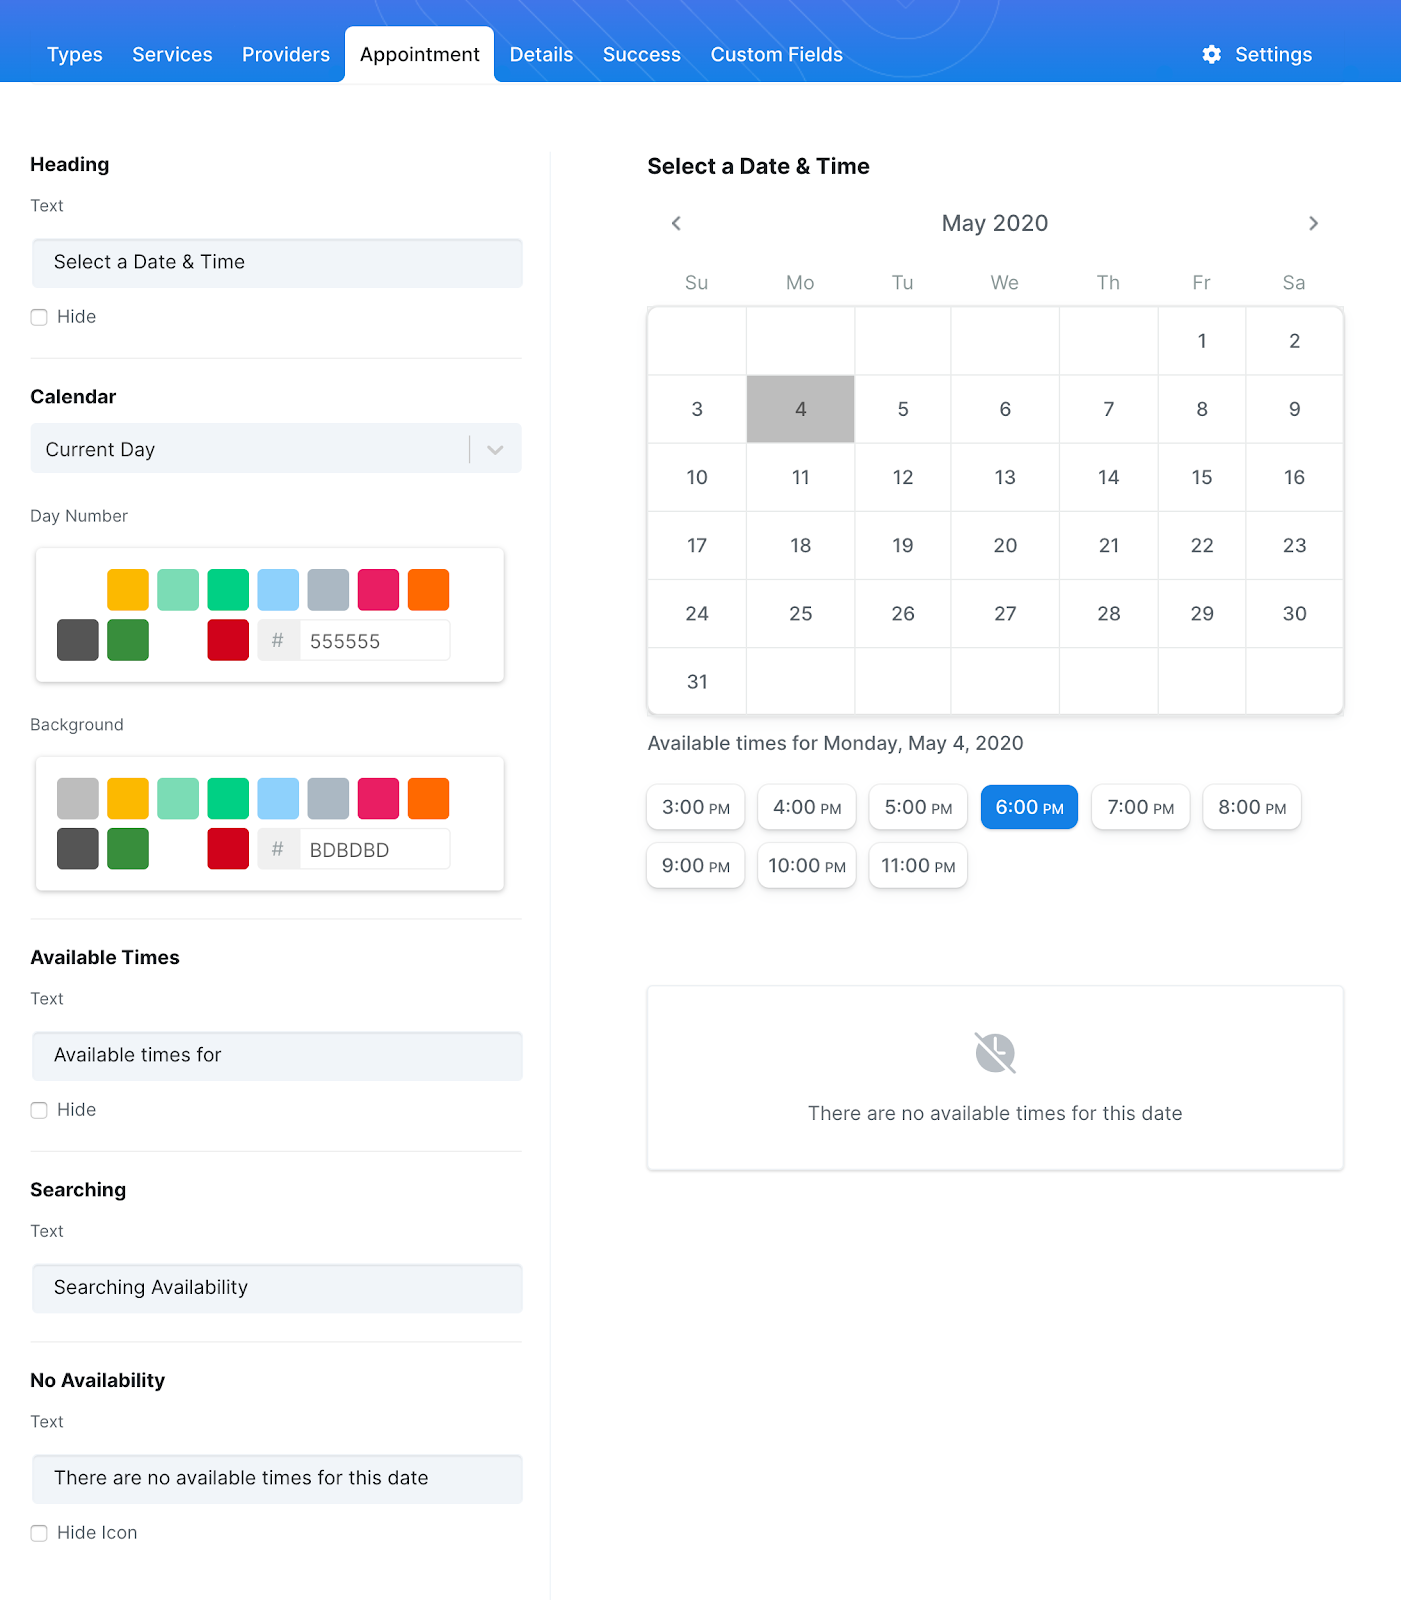
The Appointment step provides you with the ability to change the following options.
Heading
- Heading Text: Change the text of the heading in the appointment step.
- Heading Hide: Check if you want to hide the heading in the appointment step.
Calendar
- Current Day - Day Number: Change the color of the day number on the calendar.
- Current Day - Background: Change the background color of the current day.
- Selected Day - Day Number: Change the color of the selected day on the calendar.
- Selected Day - Background: Change the background color of the selected day on the calendar.
- Available Times Text: Change the text for the available times.
- Searching Text: Change the text in the loading state.
- No Availability: Change the text when there isn't any availability.
Details (Required Step)
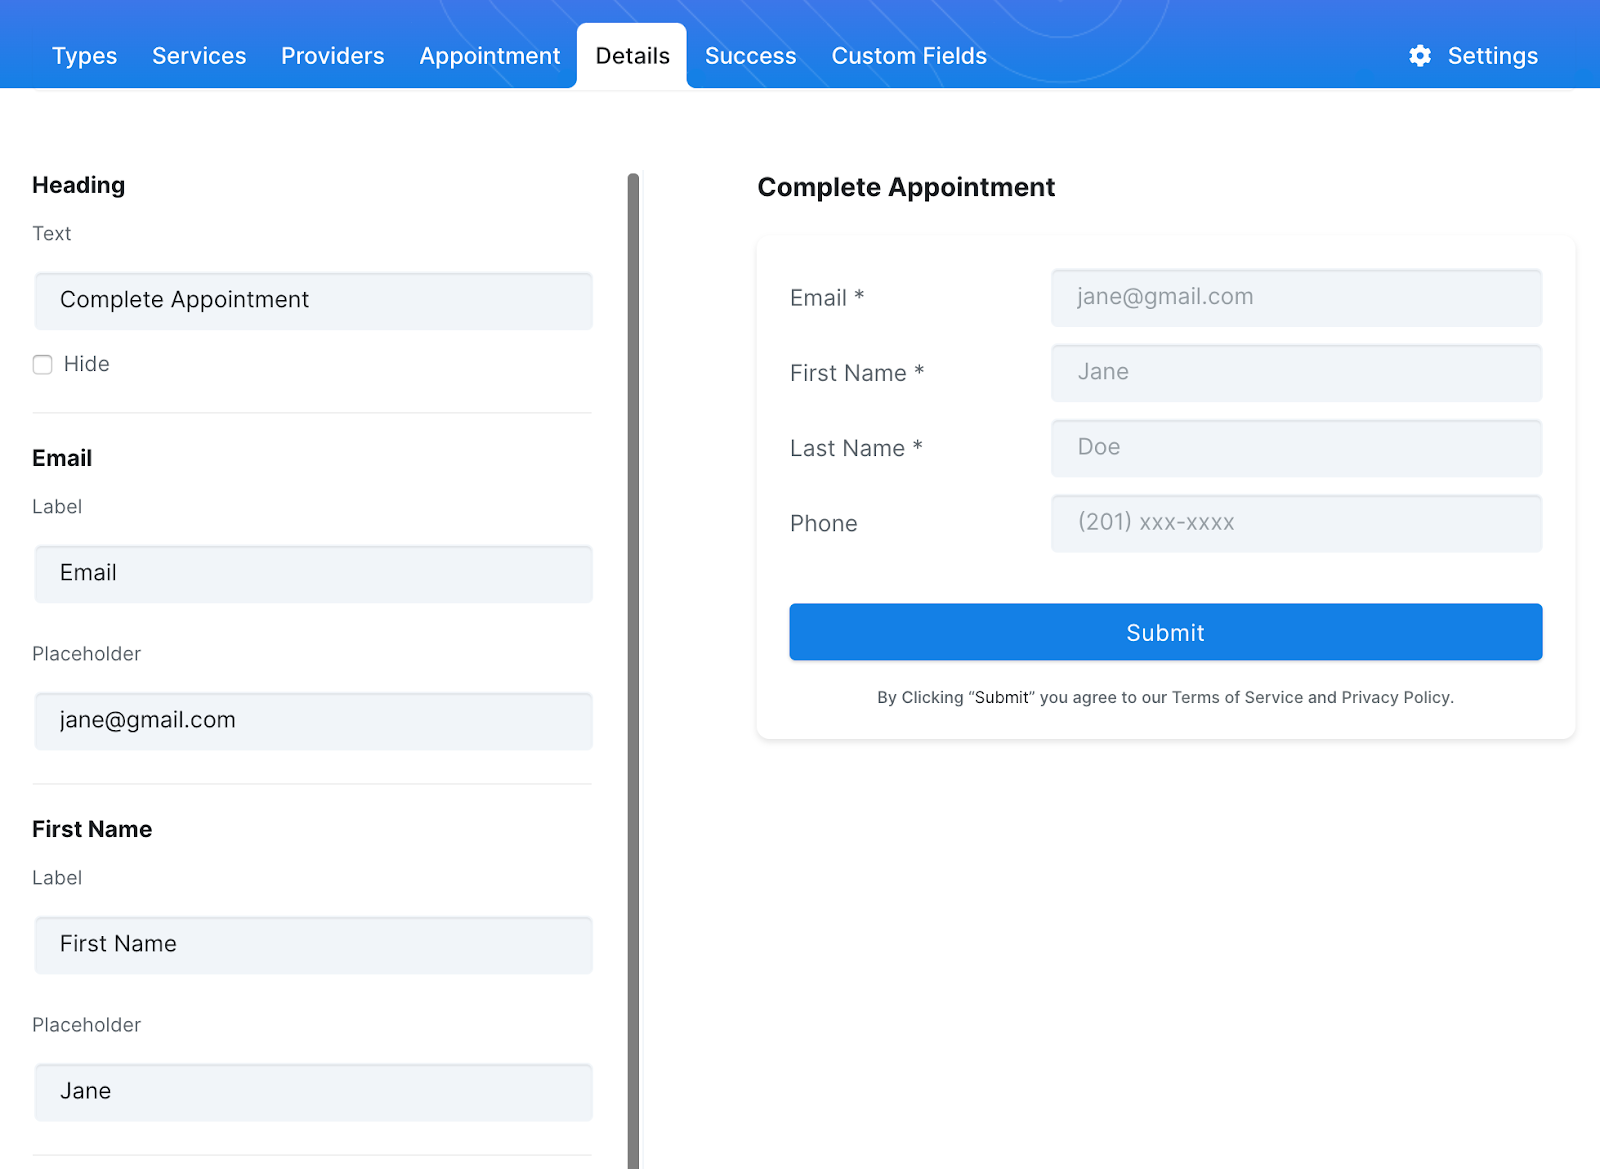
Heading
- Heading Text: Change the text of the heading in the details step.
- Heading Hide: Check if you want to hide the heading in the details step.
- Label: Set the label text for the email input.
- Placeholder: Set the placeholder text for the email input.
First Name
- Label: Set the label text for the first name input.
- Placeholder: Set the placeholder text for the first name input.
Last Name
- Label: Set the label text for the last name input.
- Placeholder: Set the placeholder text for the last name input.
Phone
- Label: Set the label text for the phone number input.
- Placeholder: Set the placeholder text for the phone number input.
- Required: Check if phone numbers are required to book appointment.
E-Commerce
- Payment Form: Check if you want to add a payment form to your booking form. This requires that you have Stripe connected.
Button
- Text: Change the text of the submit button.
Legal
- Display: Check if you want to display the legal copy below the submit button.
- Copy: Set the legal copy that is displayed below the submit button.
Success
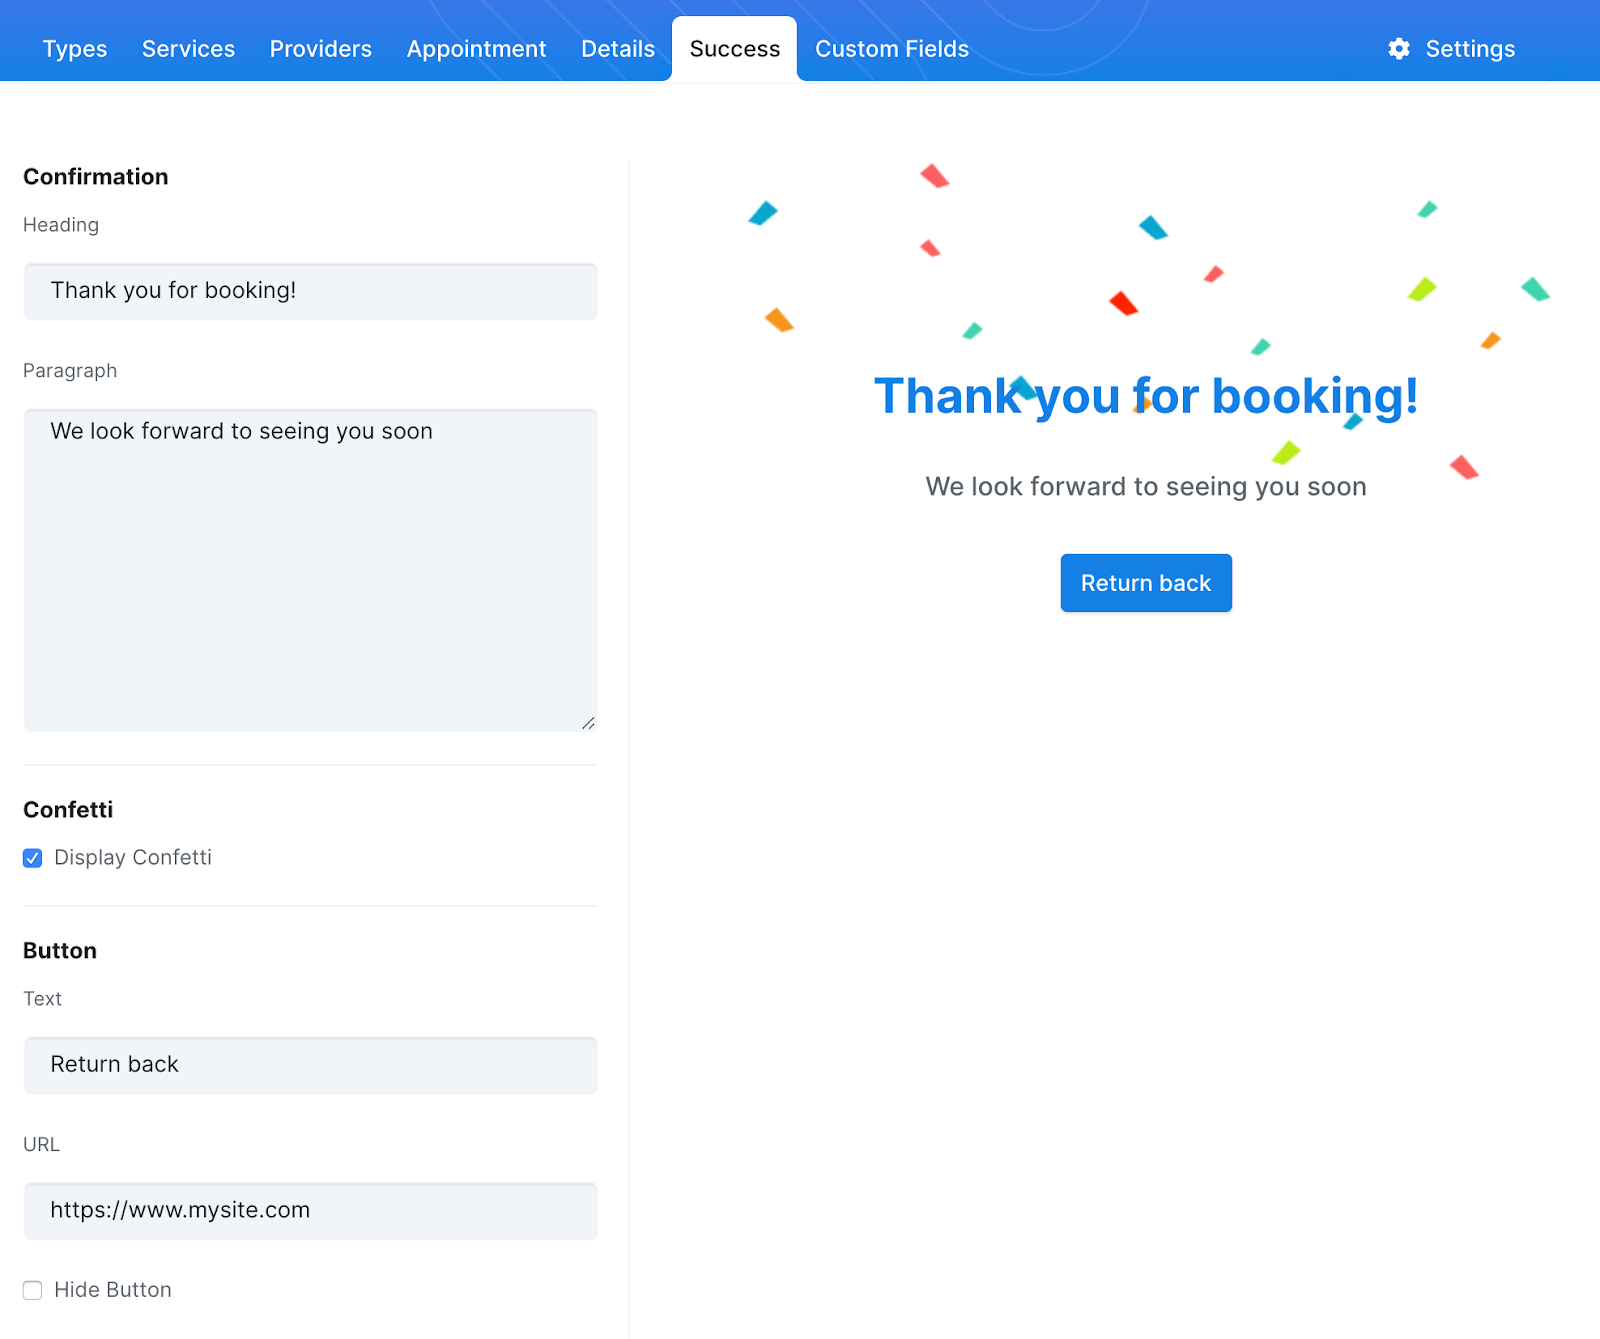
Once your form is submitted you are given a Success message. You can edit that message and even give a little confetti pop to celebrate the success.
Confirmation
- Heading Text: Change the text of the heading in the success step.
- Paragraph Text: Change the text displayed on the success step.
Confetti
- Display Confetti: Check if you want to display confetti when the appointment is created successfully.
Button
- Text: Change the text of the button displayed on the success step.
- URL: Change where you want customers to navigate after finishing the booking.
- Hide: Check if you want to hide the button on the success step.