How to set availability
Below is a breakdown for how to set and manage your availability with Start Booking.
If you'd rather watch a short video, click on the video below.
If you'd prefer to read through the overview, continue on.
Step 1:Default schedule
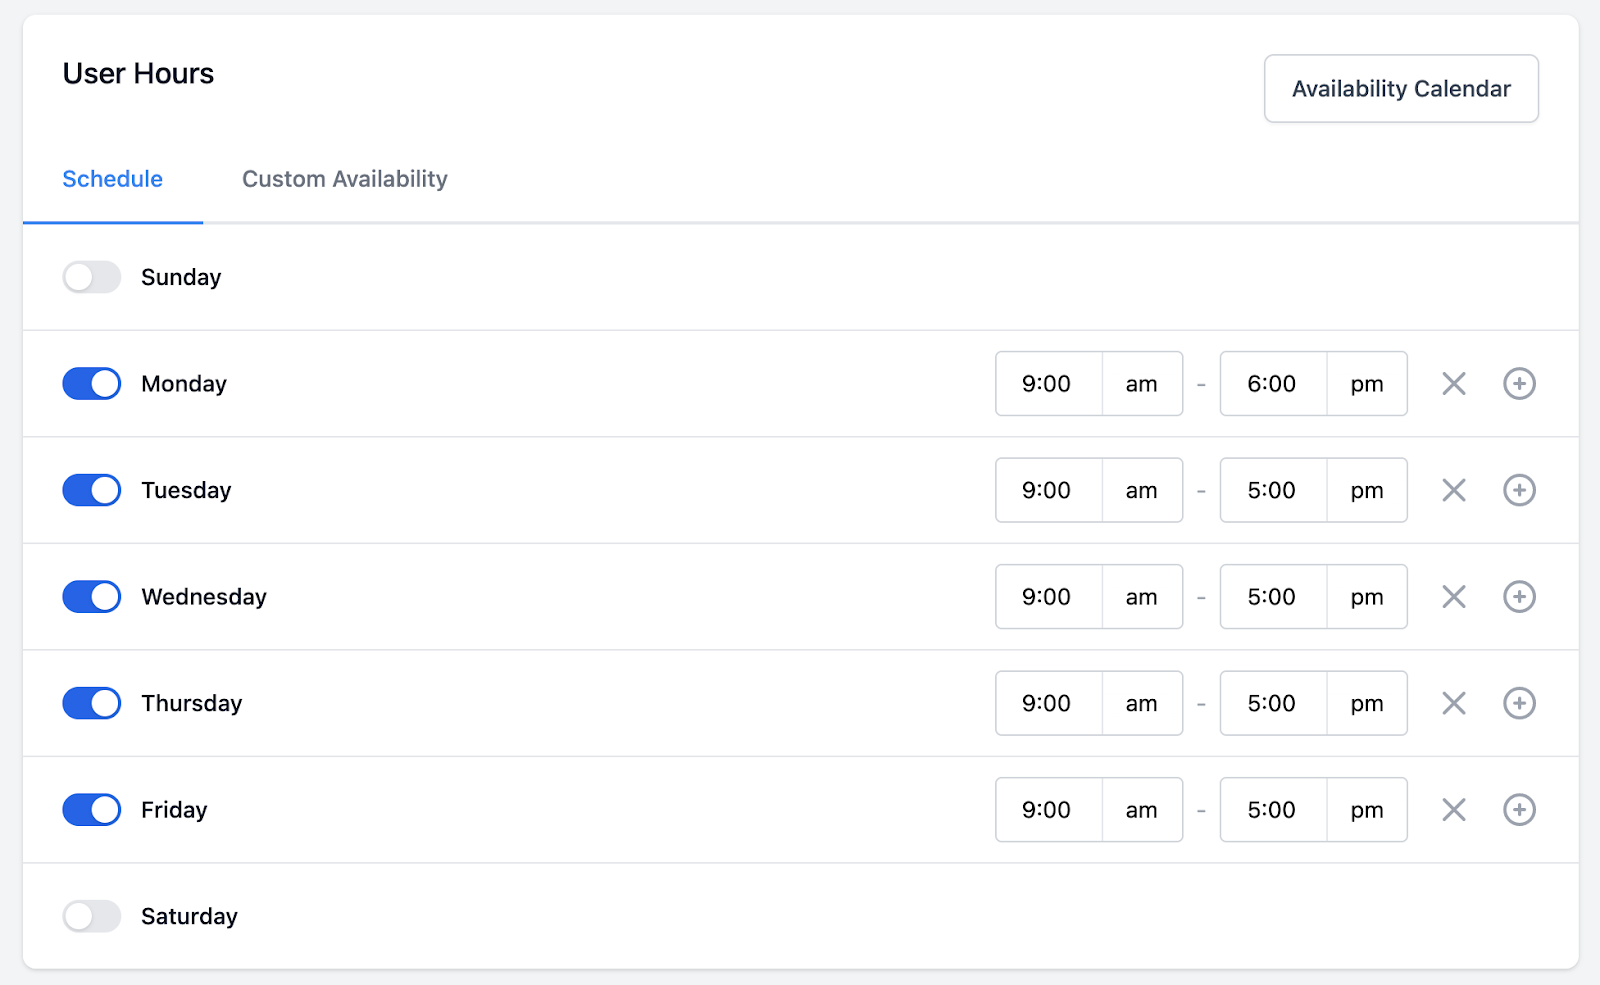
Your schedule should be set to reflect what a normal week should look like. Don't forget that you can also add multiple time slots for each day as represented below.
In this example, I've updated my Monday to be available from 9am to 11am and then again at 2pm to 6pm.

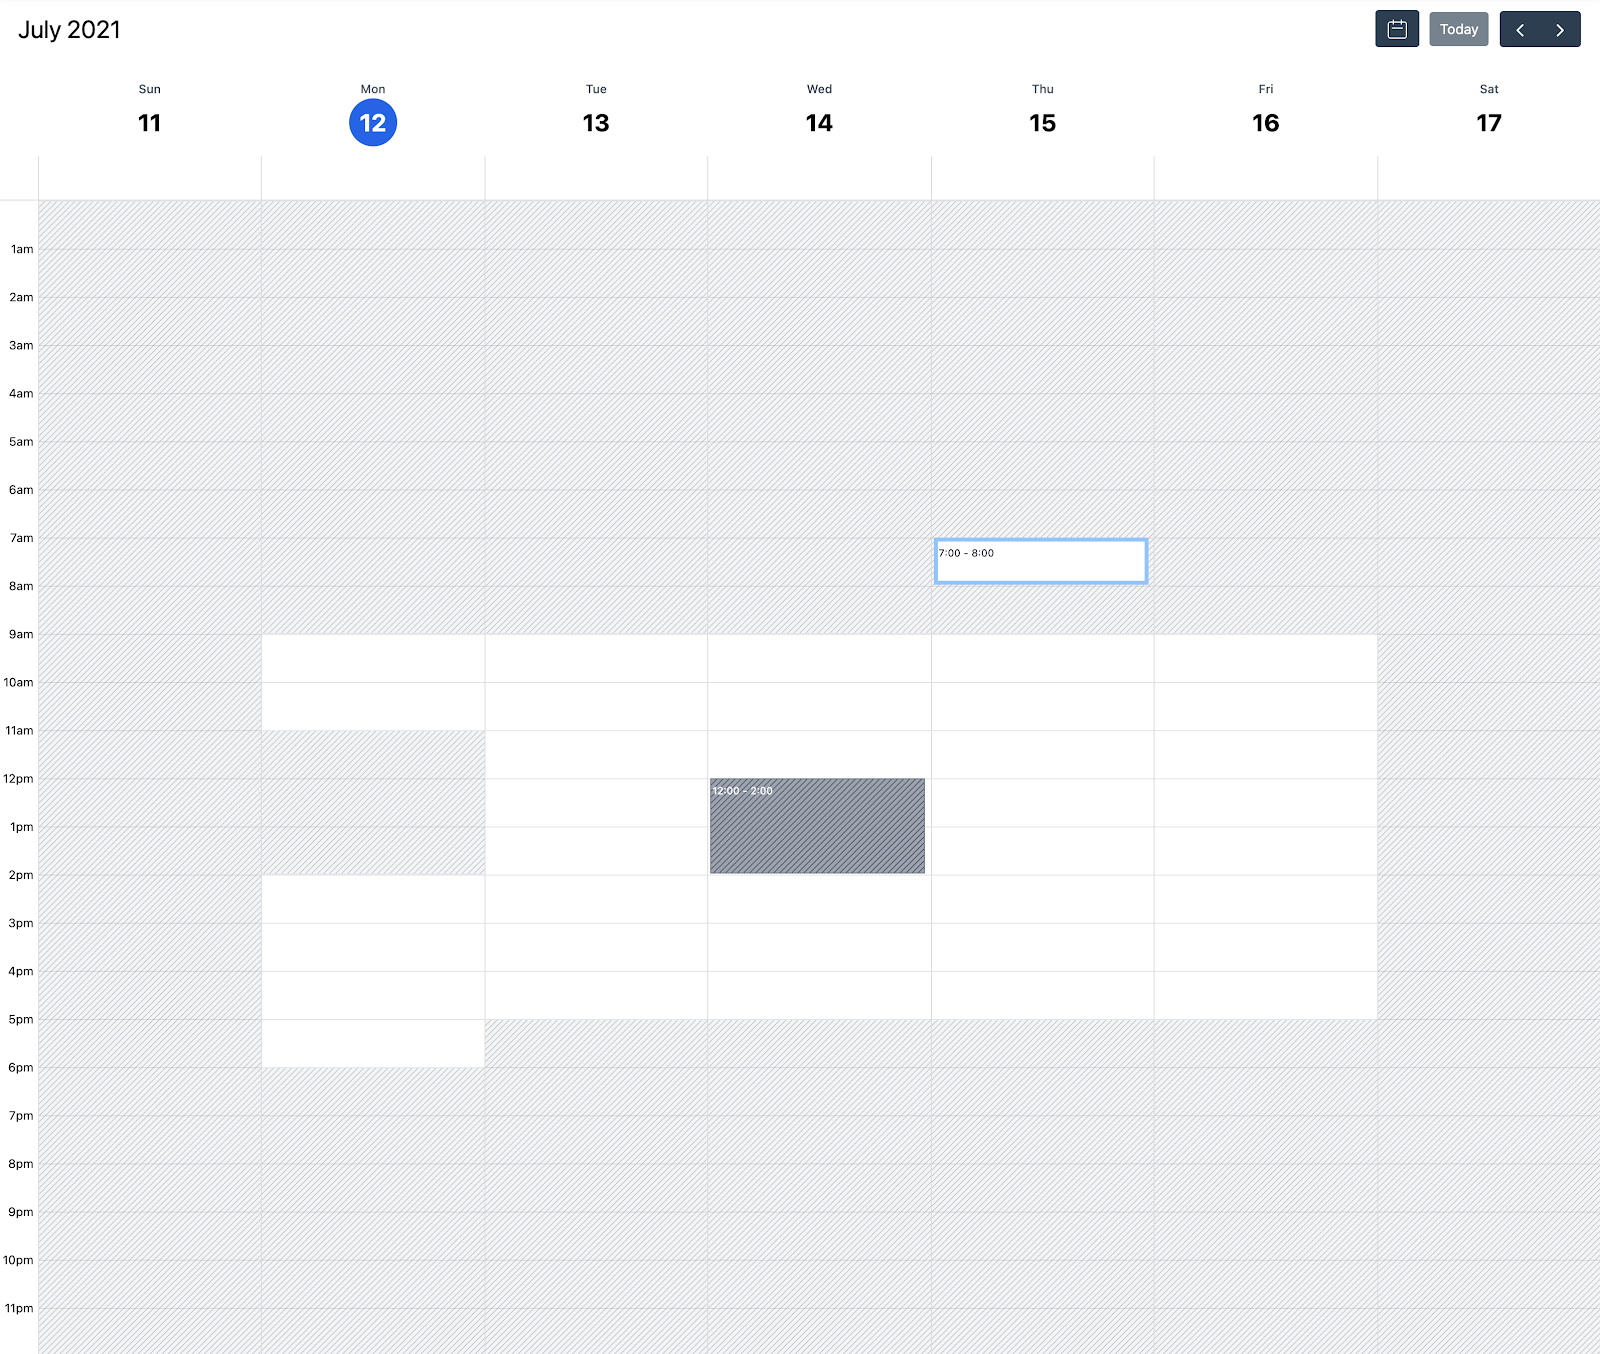
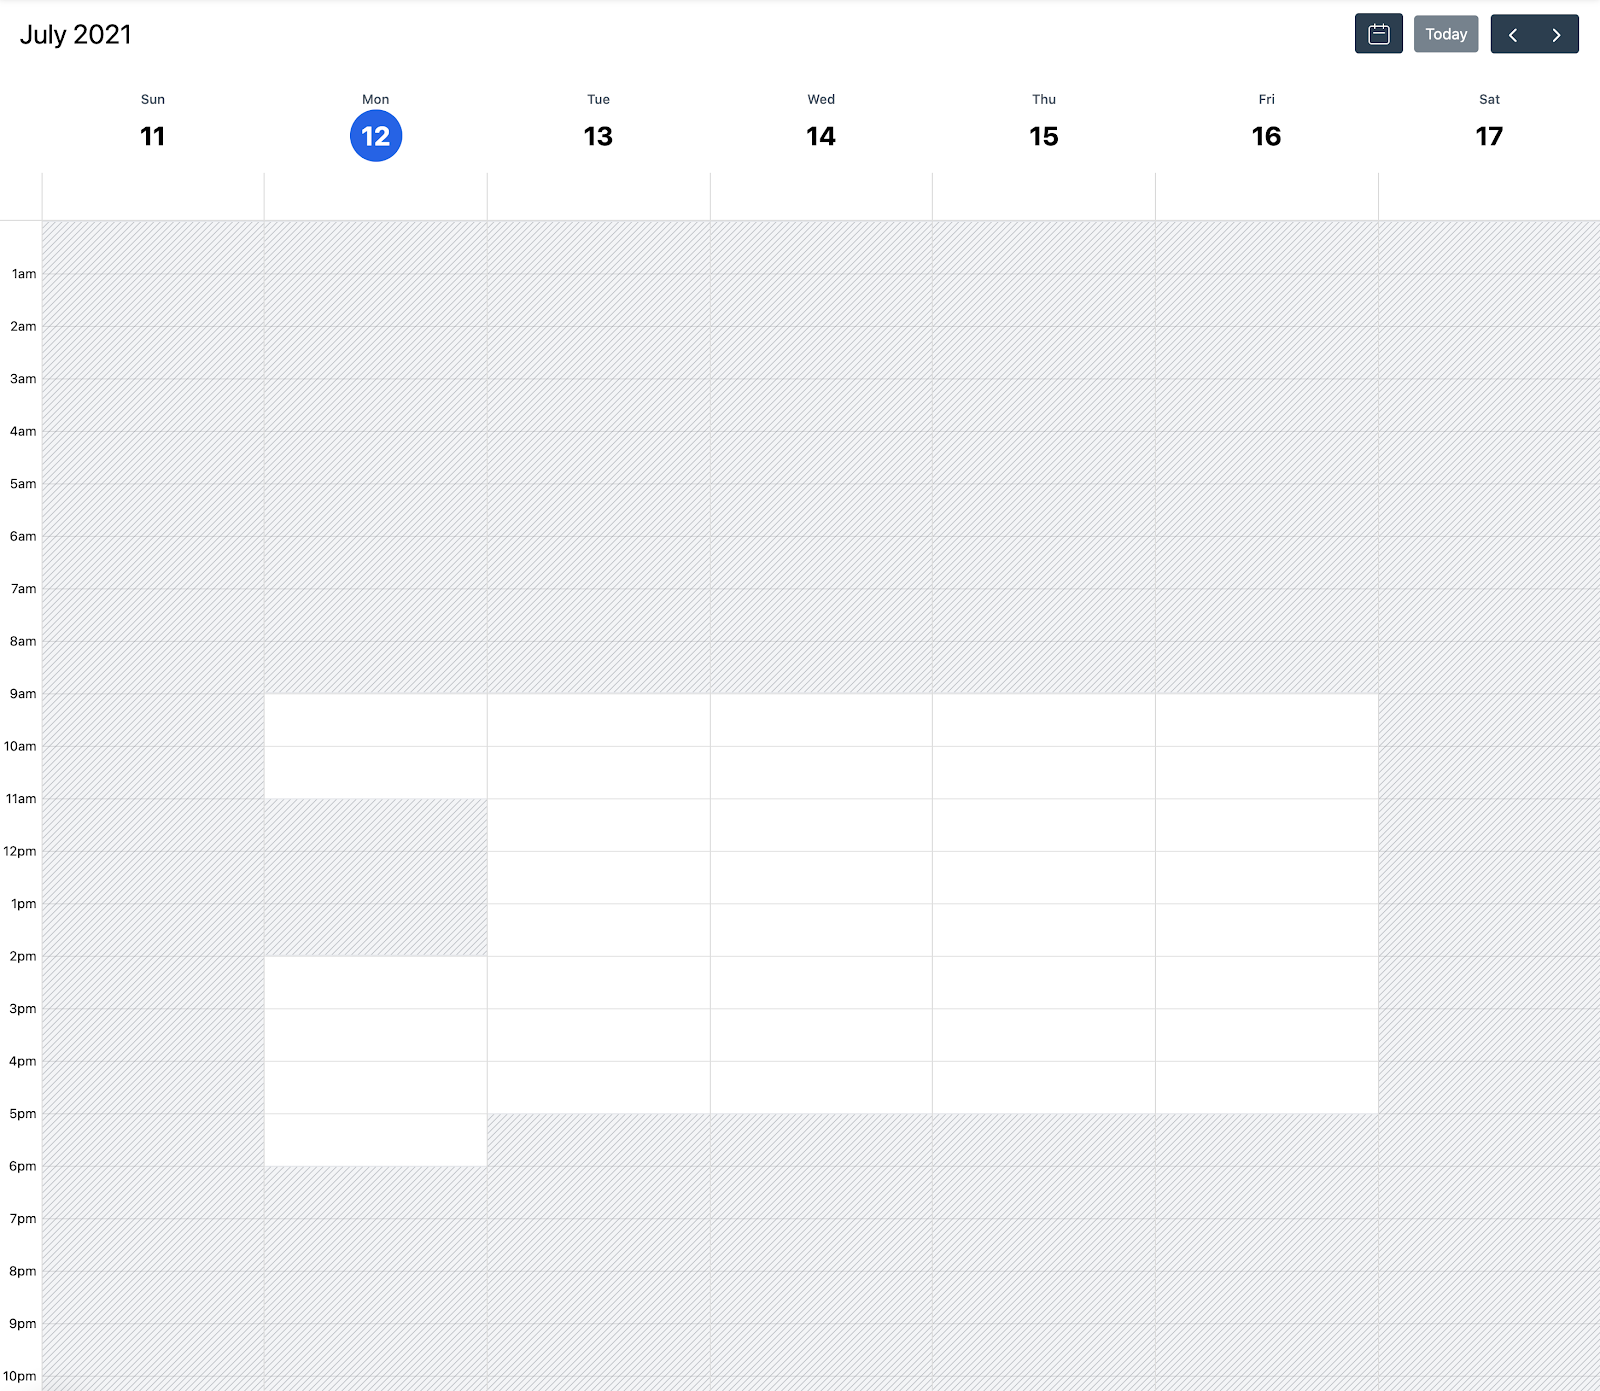
You can view your default schedule represented on your Availability Calendar.
Step 2:Custom Availability
The custom availability section is where you can set custom availability times as well as custom blockers. Typically you would use the custom availability section to define anything outside of your default schedule.
Custom Blocker
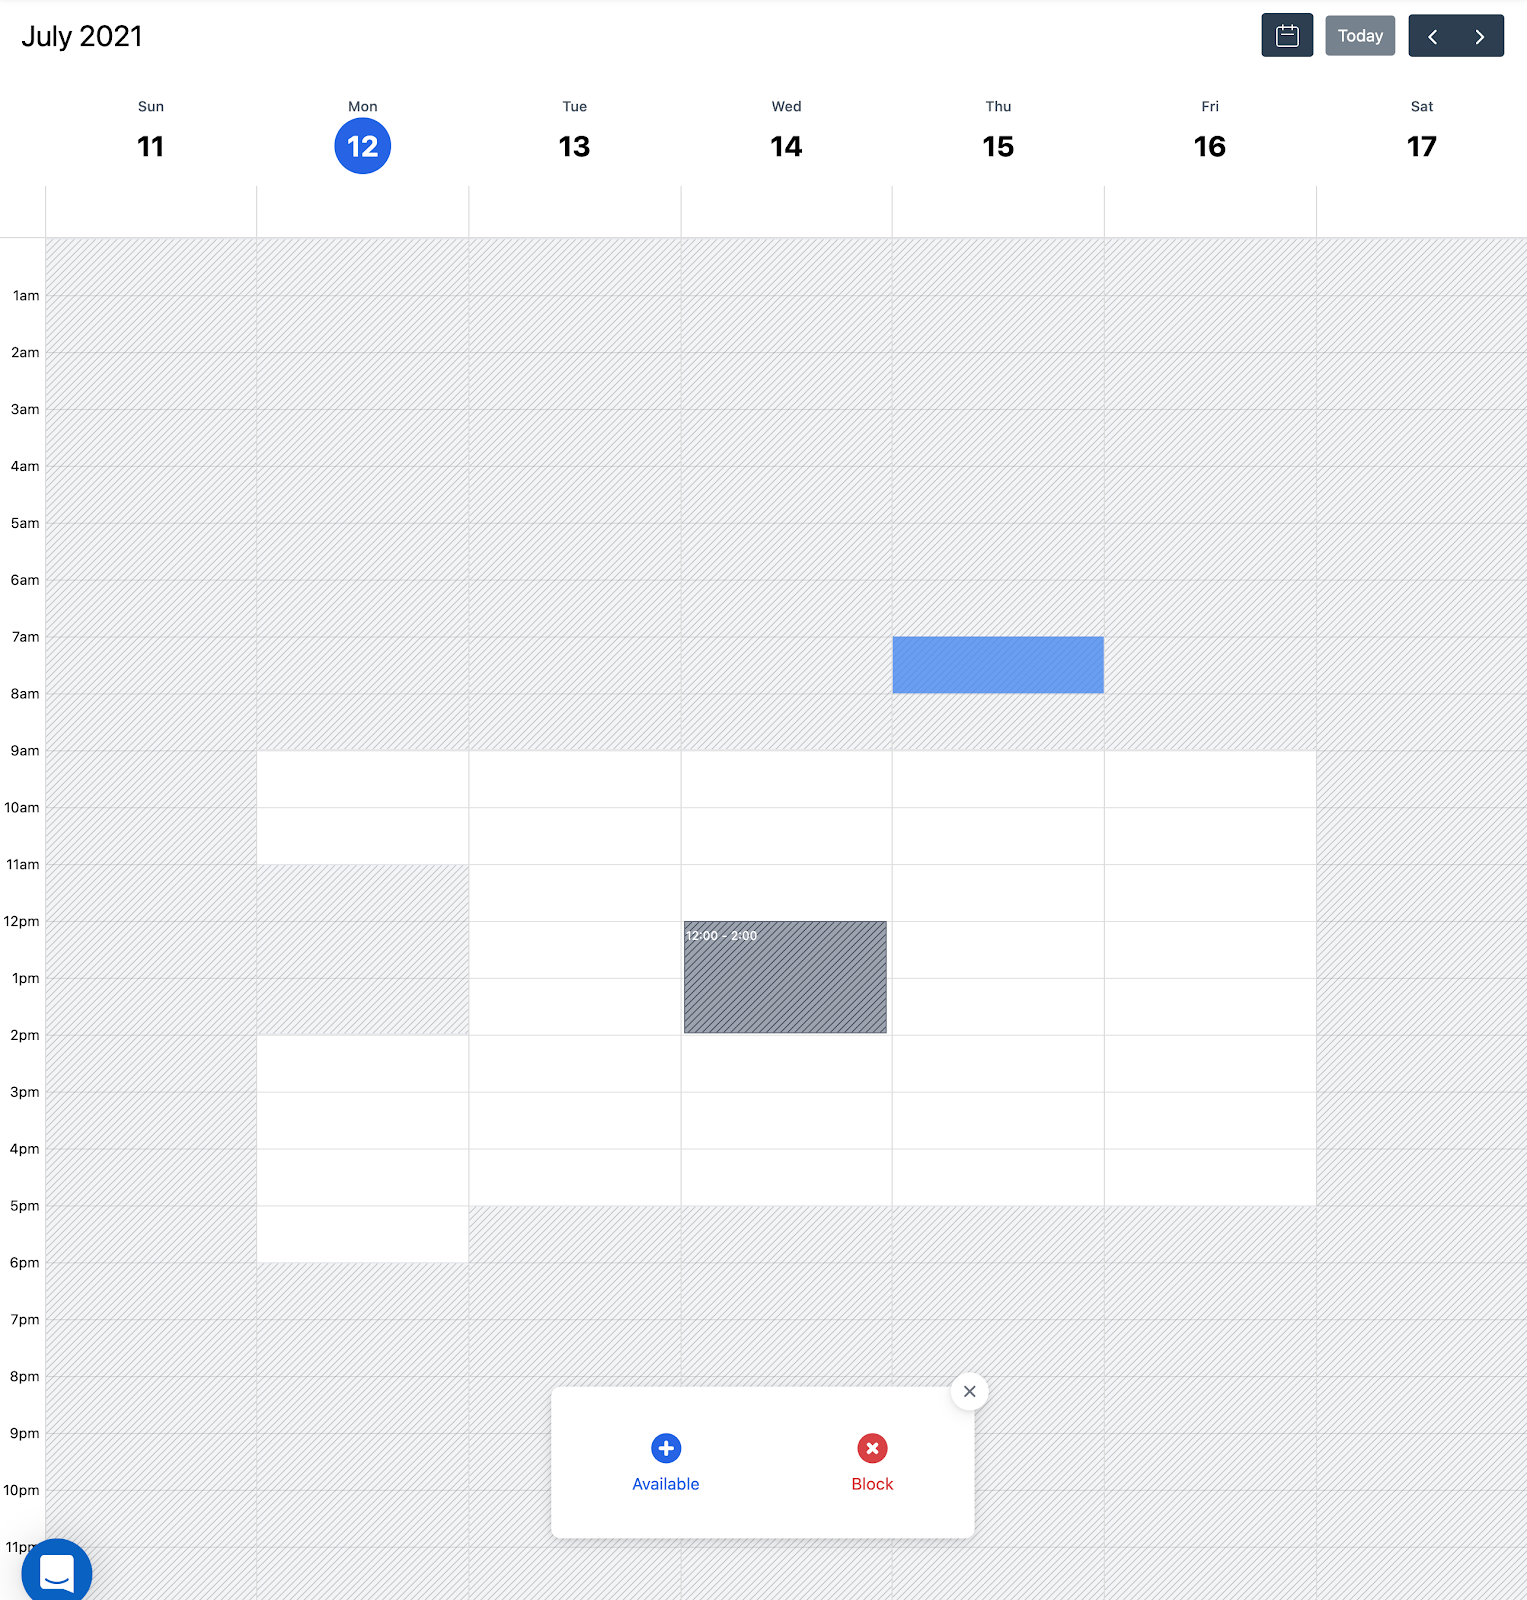
To set a custom blocker, click and drag on the calendar in the location you want to block. When you release the mouse there will be a menu appear to select the time as Available or Blocked. In this example, click Block.
After you click Block you'll see a slide out with some additional options you can select.
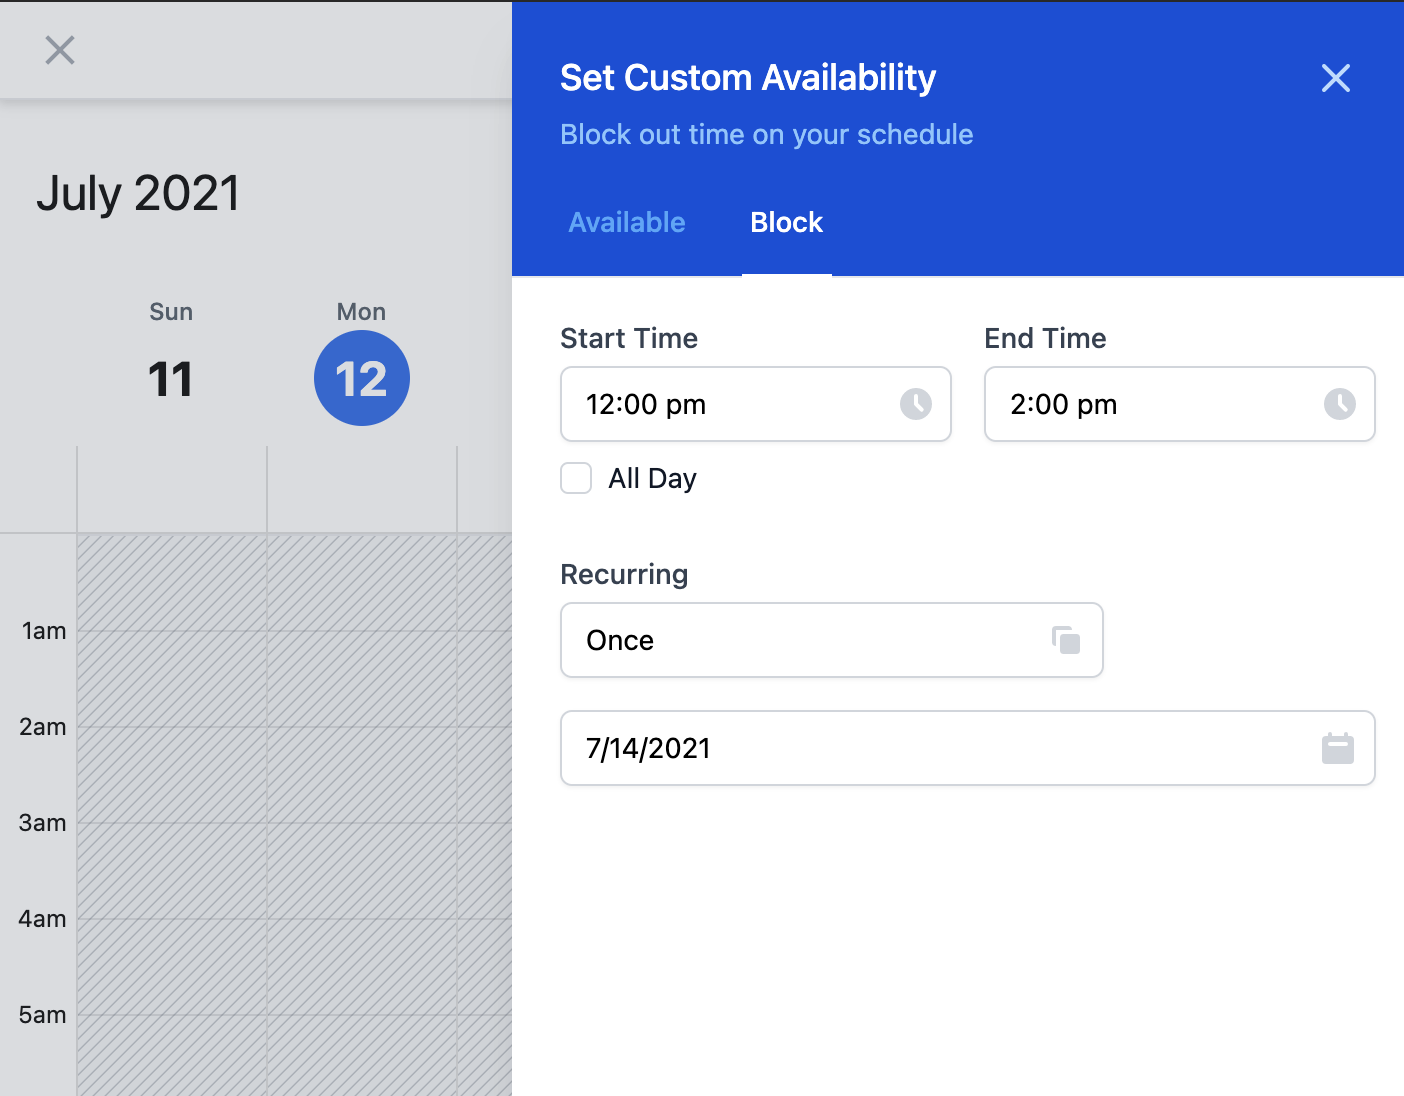
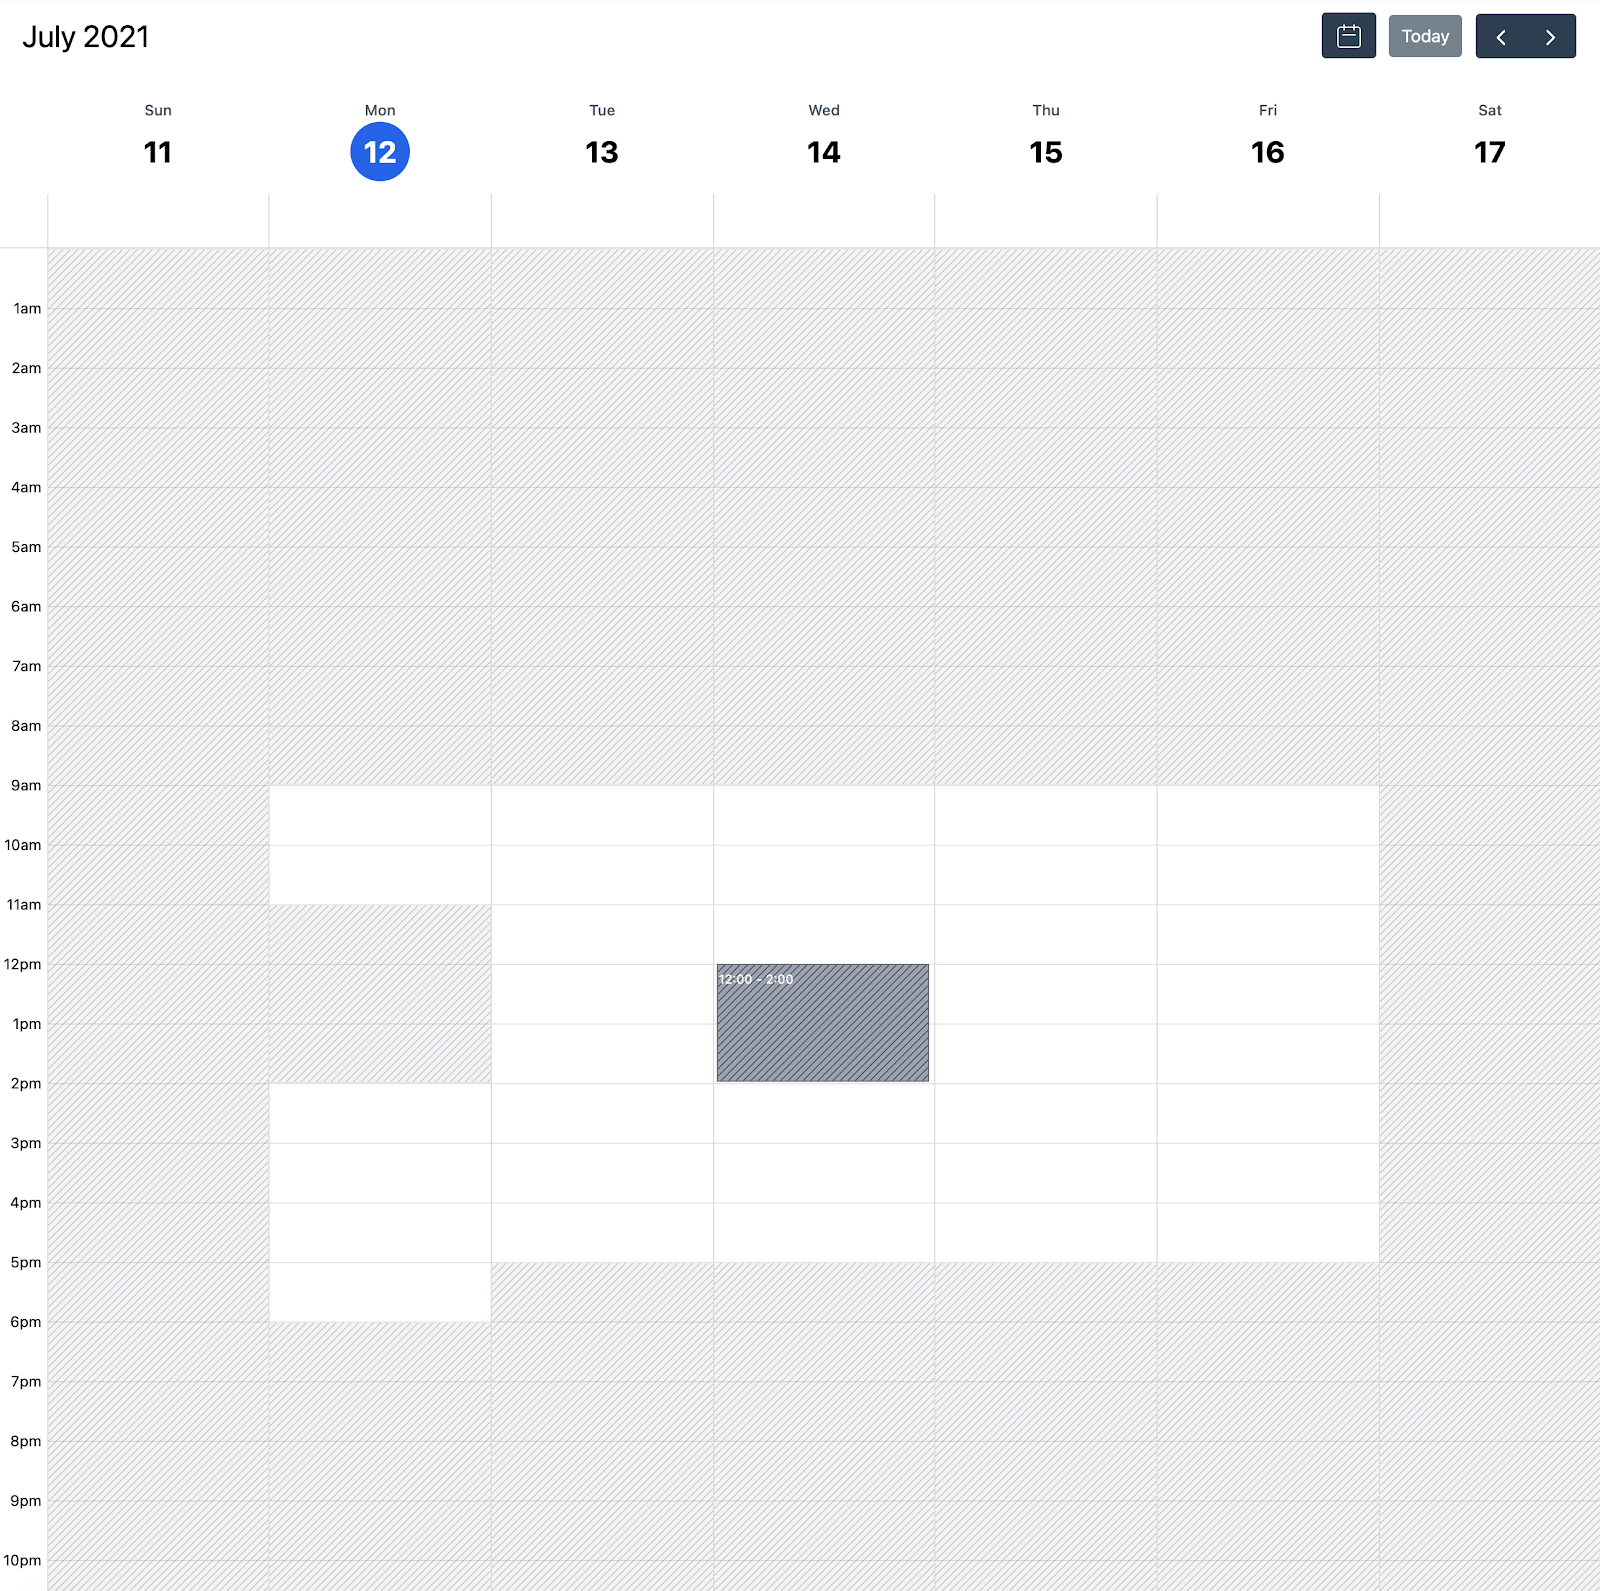
From this slide out you can adjust the time of the blocker and select if it's recurring. Once you click save on that, you'll see the blocker appear on your Availability Calendar.
Custom Availability
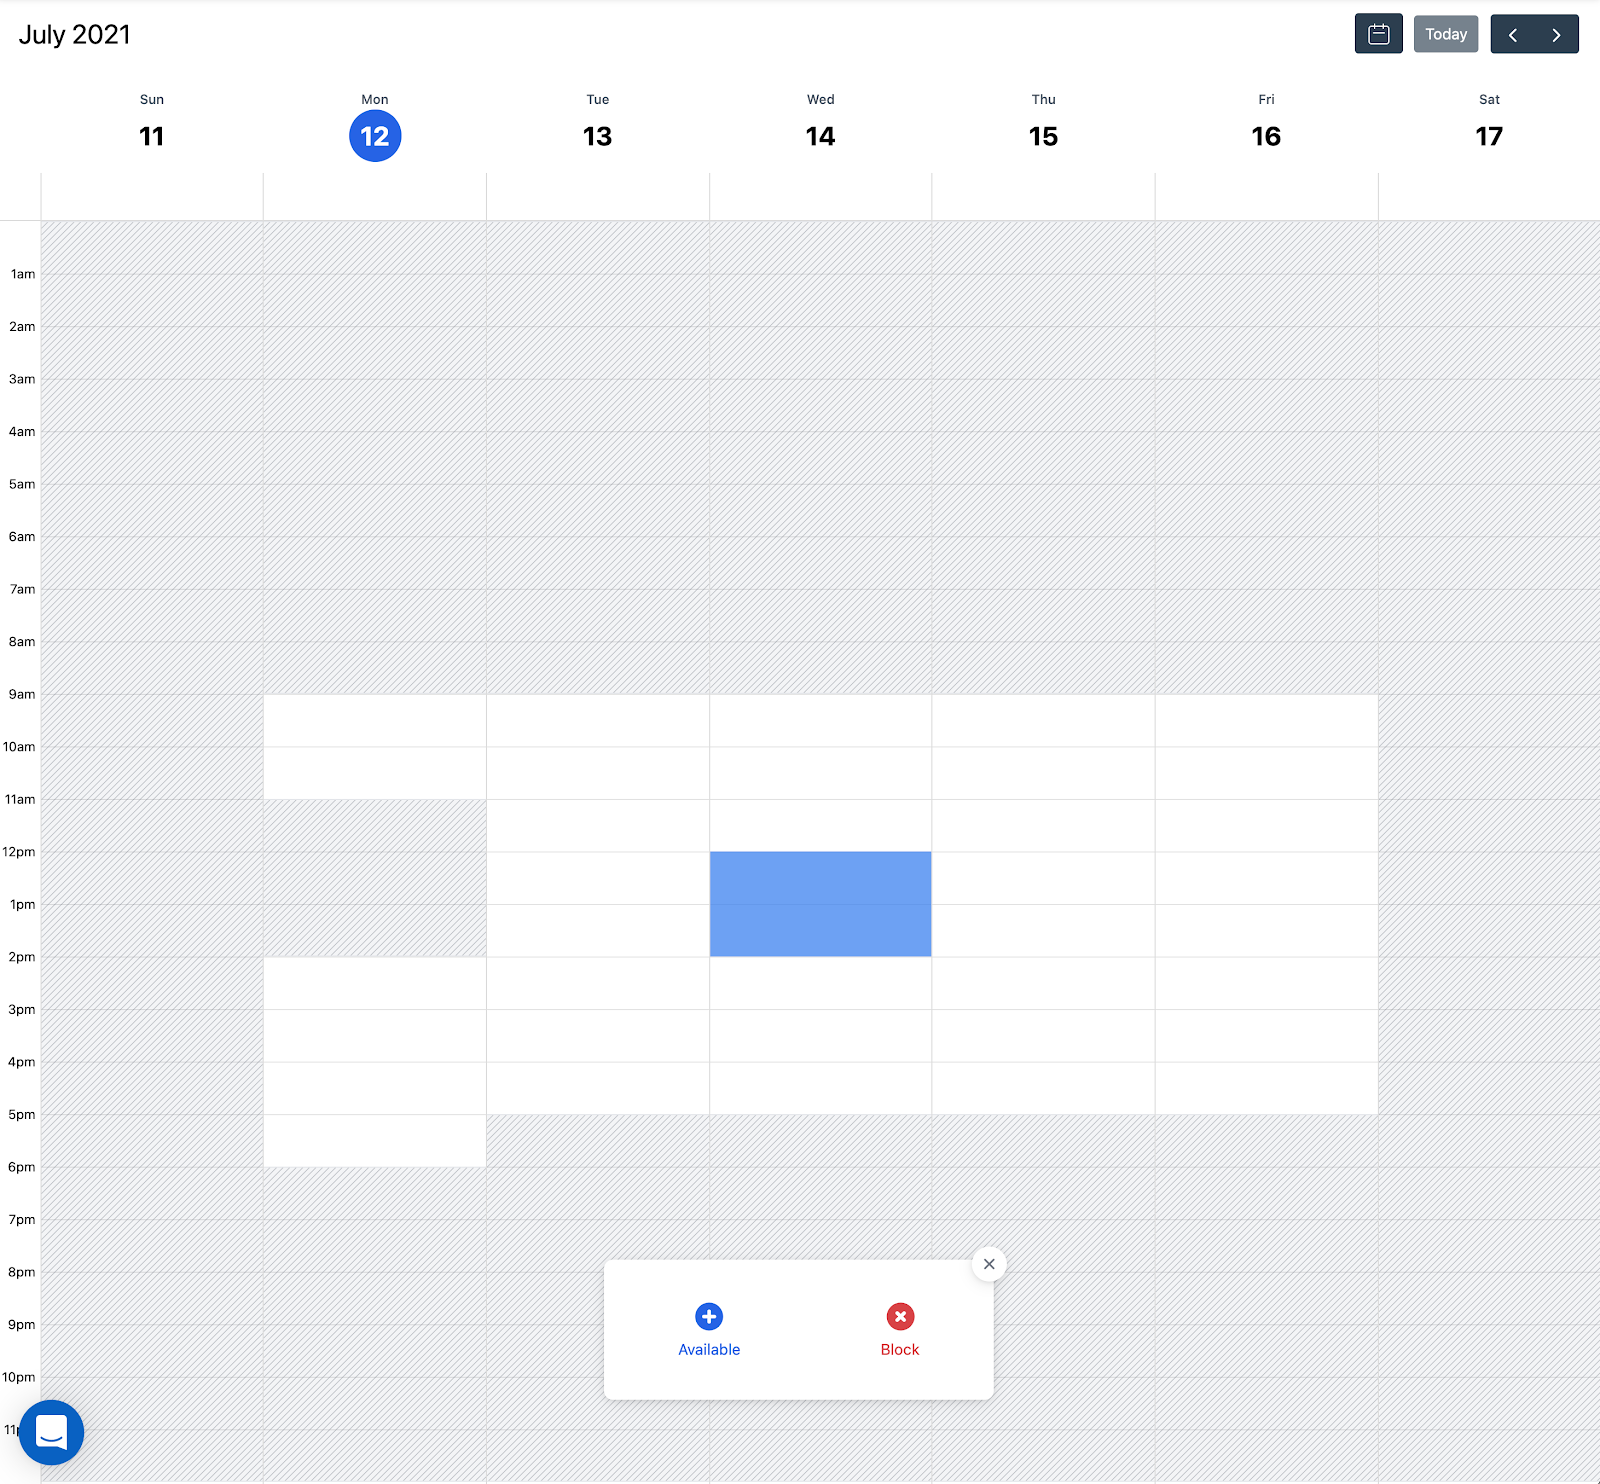
To set custom availability, click and drag on the calendar for the time you want to be available. When the menu appears at the bottom of the calendar, click on Available.
The availability slide out options are similar to the blocker options. The main difference (which is optional) is you can select a specific service to only be available for.
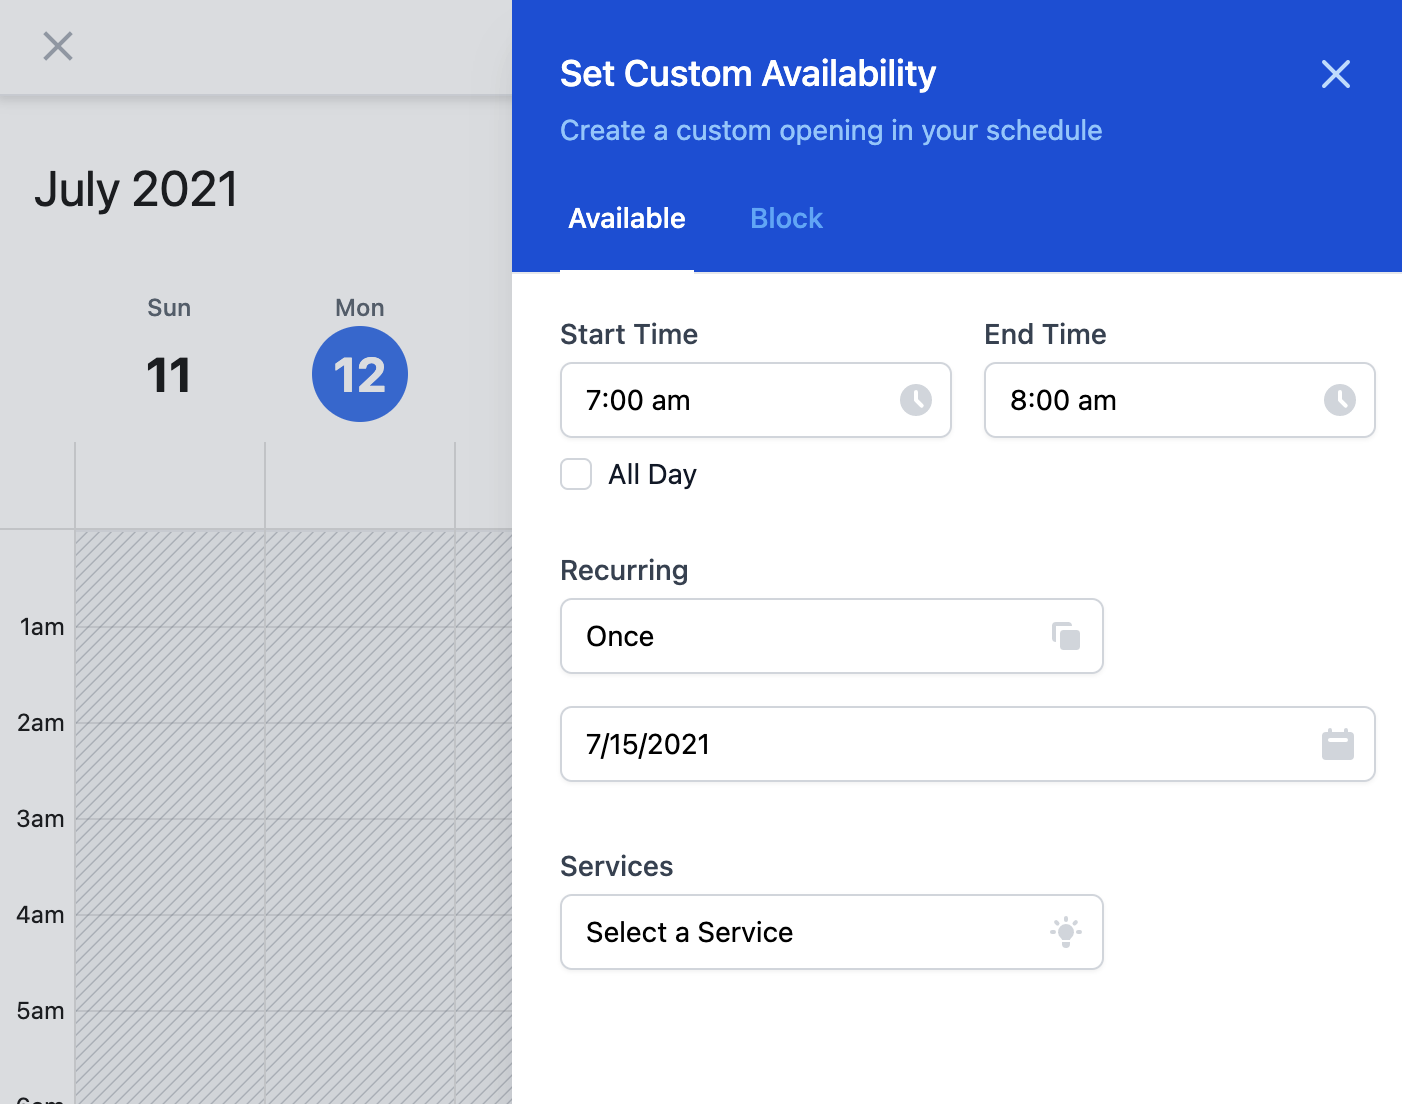
Click save and now your Availability Calendar should look like below.